The first half of my computing journey was mostly on Windows (95, 98, 2000, XP) with a couple of frustrating but educational forays into Linux. But for the second half, I’ve mostly been a Mac user. In the olden days before WSL, software development on a Unix-based system with quality hardware and an OS that mostly Just Works (TM) was the path of least resistance.
About two years ago I got a Windows PC again for the purposes of tinkering with AI models that require beefy GPU resources to run. I immediately encountered the unique friction of being a power user unable to express themself via keyboard shortcuts - cue cursing and endless searches for ”
For those cases, I wanted to map certain key commands to Mac-like equivalents. If you want the whole shebang, I would encourage you to check out this full-featured guide and script to recreating all major Mac keyboard shortcuts. It even goes as far as remapping the { Alt, Win, Ctrl } keys to behave like Mac { Cmd, Option, Ctrl }.
But there are some interesting learnings in trying to replicate something like this yourself, and I only wanted a few key combos anyway. AutoHotkey comes up pretty frequently in system customization discussions, and this seemed like a great opportunity to give it a try.
The Goal
Remap Ctrl + Shift + ] and Ctrl + Shift + [ to navigate between tabs in applications, by aliasing them to the system-wide Ctrl + Tab and Ctrl + Shift + Tab shortcuts. Some applications have other tab navigation shortcuts (e.g. Firefox uses Ctrl + PgUp and Ctrl + PgDn), but we want this alias to work in as many places as possible.
The Working Implementation
#Requires AutoHotkey v2.0

; Ctrl + Shift + ] moves to next tab
^+]::Send("^{Tab}")

; Ctrl + Shift + [ moves to previous tab
^+[::Send("^+{Tab}")
Depending on your familiarity with scripting languages, this may seem straightforward or like absolute gibberish.
Breaking Down the Script
Let’s take a closer look at what each part of the working code does:
-
#Requires: This line ensures that the script runs with AutoHotkey version 2.0. The syntax is pretty different between the two, and any content online before ~2022 is likely to be in the v1 syntax. -
Modifier Keys: In AutoHotkey,
^represents theCtrlkey, and+represents theShiftkey. So^+]meansCtrl + Shift + ]and^+[meansCtrl + Shift + [. Full docs here. -
Binding Syntax: The
::is how you bind a hotkey to an action. Anything to the left is the sequence of key commands you want to press, and anything to the right (or below, wrapped in curly braces) is what you want that sequence of keys to accomplish. In this case, we really just want to send a different sequence of keys, but you can do some pretty complex things here, including opening programs, performing calculations, displaying text. -
The Send Function:
Send("^{Tab}")sends theCtrl + Tabcommand to the system. The curly braces aroundTabtell AutoHotkey, “This is a special key, not just the letters T, a, and b.”
The special key syntax caused me a lot of consternation, so I’m going to outline how I debugged my way to a working solution for folks who, like me, may be prone to jumping right into solving problems without reading the docs first.
AutoHotkey Debugging
-
Initial Attempt: Armed with a basic understanding of syntax, I set up the seemingly straightforward implementation below. Testing this out in Firefox, I found that
Ctrl + Shift + [opened the previously closed tab, and pressingCtrl + Shift + ]opened a new tab. What could be causing it toSenddifferent key commands than I configured?/* This is broken. Do not do this. */ ^+]::Send("^Tab") ^+[::Send("^+Tab") -
Using ToolTip for Debugging: As a first step in verifying that the commands were registering, I used
ToolTipto display messages when the script ran. It’s a simple way to check if the script was even getting triggered; you can use MsgBox for a popup window but in this case we wanted to keep focus on the target window, and displaying a tooltip alongside the cursor was a more streamlined way of debugging while keeping window focus./* This is broken. Do not do this. */ ^+[:: { ToolTip("Sending Ctrl + Shift + Tab") Send("^+Tab") } ^+]:: { ToolTip("Sending Ctrl + Tab") Send("^Tab") } -
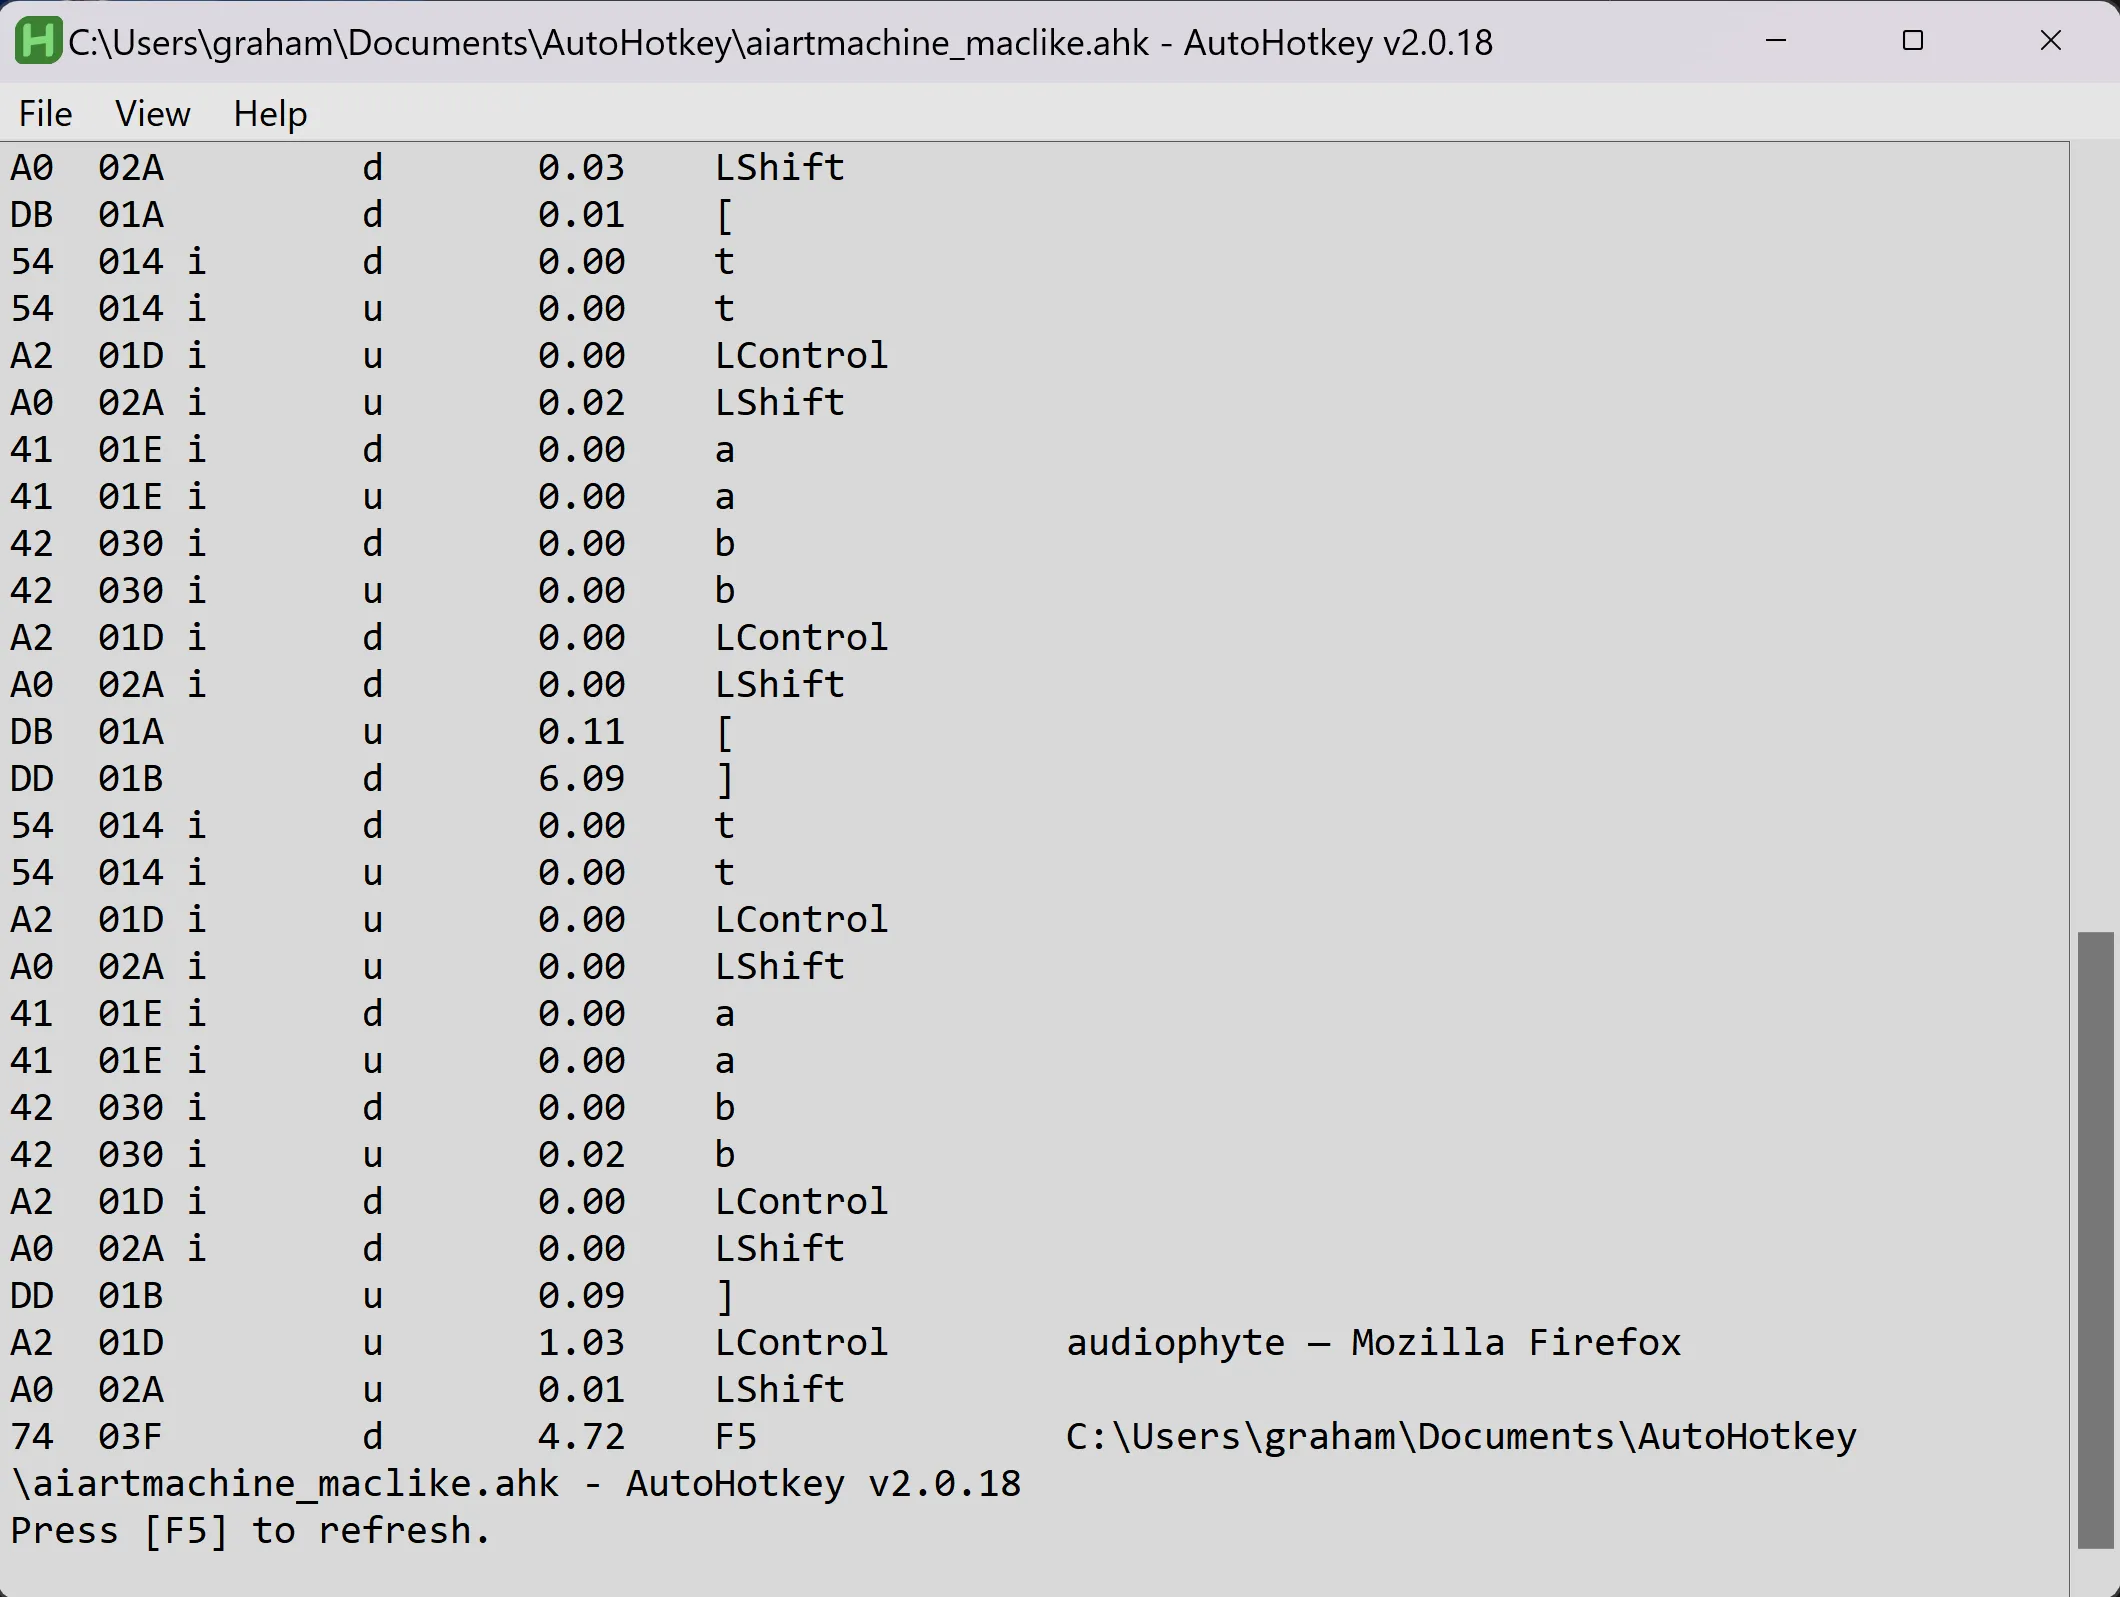
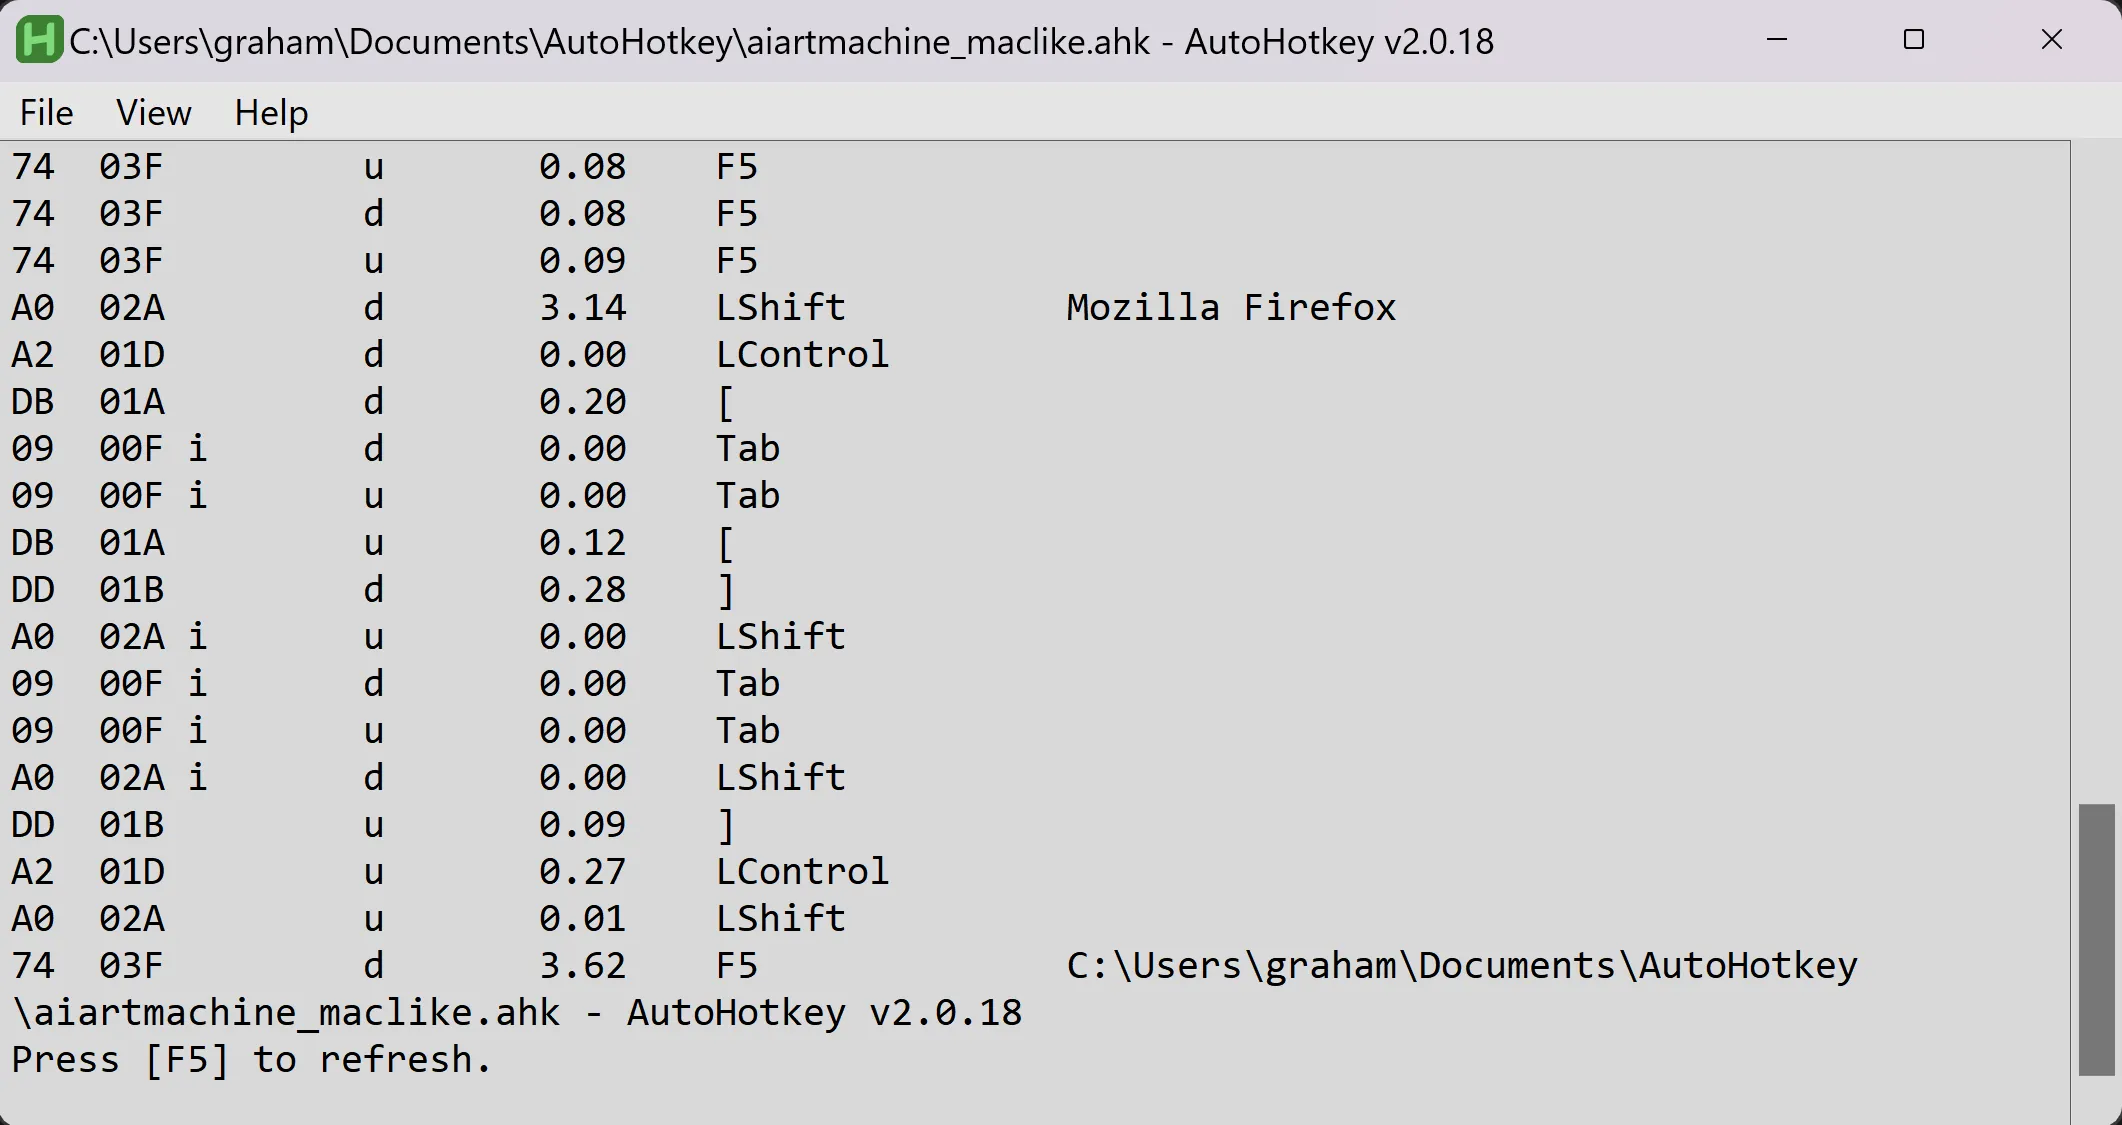
Key History and Debugging: Since the command was being triggered as expected, we needed to figure out what it was actually sending. Here, AutoHotkey’s
KeyHistoryfeature was helpful. It confirmed that the hotkeys were being triggered, but there were also suspicious stray letters in the log that I know I wasn’t inputting.F1::KeyHistory()
-
Syntax Investigation: The errant letters were consistently
aandbWithout curly braces aroundTab, the script was sendingT,a, andbas separate keystrokes. The weird behavior in Firefox was a result of accidentally sending theCtrl + TandCtrl + Shift + Tcommands, which respectively open a new tab or reopen a closed tab.
Had I read the AutoHotkey documentation on sending keys first instead of pattern-matching against a couple of StackOverflow posts, I probably wouldn’t have made this mistake at all. But it taught me a few helpful debugging tools that I’ve already used in subsequent projects.
Configuring the AutoHotkey Script to Run
Executing the Script
Save your script with the .ahk extension. For example, you might save it as TabNavigation.ahk. AutoHotkey’s default save location is in \Documents\AutoHotkey, and you can run the script by double-clicking the .ahk file. You should see the AutoHotkey icon appear in your system tray, indicating that the script is active, and if you make changes / rerun the script it will prompt you with a dialog allowing you to replace the currently running instance of the script.
Adding the Script to Startup
To run this script in the background automatically every time you start your computer, you’ll need to add it to the Windows Startup folder.
-
Create a Shortcut:
- Right-click on your
.ahkfile and select “Show More Options” (if you’re on Windows 11) or directly “Create Shortcut” on older versions. - This will create a shortcut to your script in the same directory.
- Right-click on your
-
Open the Startup Folder:
- Press
Win + Rto open the Run dialog. - Type
shell:startupand hit Enter. This will open the Startup folder, which contains programs that run automatically when Windows starts.
- Press
-
Move the Shortcut:
- Cut the shortcut you created (
Ctrl + Cor right-click > “Cut”). - Paste the shortcut into the Startup folder (
Ctrl + Vor right-click inside the folder > “Paste”).
- Cut the shortcut you created (
Your script will now run automatically every time you start your computer.
You can do this with multiple independent scripts, but keeping multiple keybindings in the same .ahk file cuts down on the amount of startup configuration you need to do.